Share
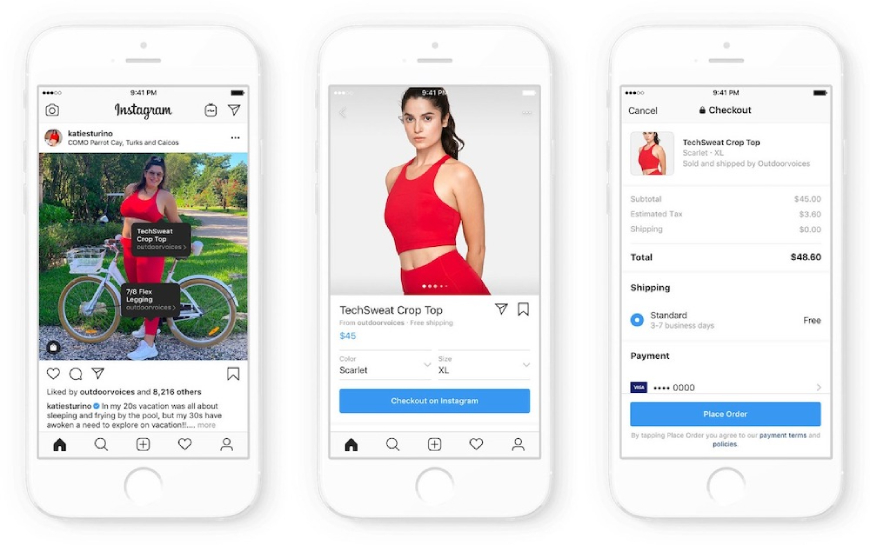
Instagram’s Shop feature was released in May 2020, offering a way for businesses to showcase their product catalogues and reach new customers on the platform. It allows brands to curate lists of shoppable items that are directly accessible through the “View Shop” button on their profile page and gives them the chance to get featured on the Instagram Shop tab - a new shopping destination that can be found on the app’s main navigation menu. Businesses and creators in the US (although a wider rollout has been promised by the platform) also have access to Instagram Checkout, meaning shoppers can purchase goods without even leaving the app.
Want to get started with an Instagram Shop? Follow our simple guide below.
Make Sure Your Business is Eligible
Firstly, check that your business ticks all of the following boxes in order to be eligible for an Instagram Shop:
✔️ It’s located in one of Instagram’s supported markets
✔️ It has an eligible product to sell
✔️ It complies with Instagram’s merchant agreement and commerce policies
✔️ It owns a website domain to sell from
Convert to a Business or Creator Account
Next, if you haven’t done so already, you’ll need to convert your account to a business or creator account. A business account enables you to run ads and add relevant information to your profile, such as opening hours, business address, phone number and a link to your website, whereas a creator account lets you access features that make it easier to control your online presence, understand your growth and manage your messages.
Connect to a Facebook Page
After converting to a business or creator account, it’s time to link your Instagram account with your brand’s Facebook page.
1. Go to your business’s Instagram profile.
2. Select “Edit profile”.
3. Under the “Public business information” section, select “Page”.
4. Choose a Facebook Page from your Pages that you’d like to connect.
5. If you don’t have a Facebook Page, select “Create a new Facebook Page”.
Note: You don’t need to have a Facebook Page Shop, only a Facebook Page.
Upload Your Product Catalogue
An Instagram Shop requires you to have a product catalogue, which is a list of all your items with a description for each one. There are two ways to connect a product catalogue to your Instagram business account:
→ Catalogue Manager
This is the “do it yourself” method found within Facebook’s Business Manager.
→ eCommerce Platform Manager
Add products via an integration with one of Instagram’s certified eCommerce platform partners such as Shopify or BigCommerce.
Submit Your Account for Review
Once you’ve connected your product catalogue to your brand’s Instagram account, you’ll then need to submit your account for review. Account reviews typically take a few days but sometimes can take longer.
1. Go to your business’s Instagram profile and tap ☰
2. Select “Settings”.
3. Sign up for shopping.
4. Follow the steps to submit your account for review.
5. Visit the “Shopping” section in your settings at any time to check your page’s status.
Note: Some businesses may need to prove ownership of their website domain before their account can be reviewed. This will need to be carried out through Instagram’s domain verification process.
Turn On Shopping Features
Hooray - your account has been approved as a Shop! Now it’s time to switch on your shopping features.
1. Go to your business’s Instagram profile and tap ☰
2. Select “Settings”.
3. Select “Business” followed by “Shopping”.
4. Choose the product catalogue that you want to connect to your page and select “Done”.
Your Instagram Shop will now automatically appear on your brand’s profile page.
Start Selling
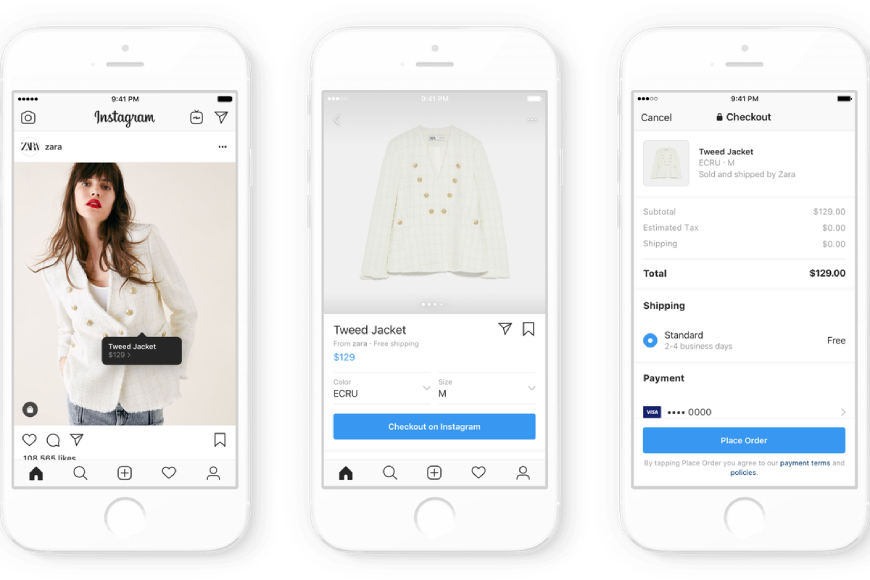
Now that you’ve enabled Shopping, you can use product tags to highlight items in your photos and videos across your feed and stories. Plus, a new “View Shop” button will appear on your page, where visitors will be able to browse your products, read information about each one and shop. Fun fact: the “Swipe up” option in stories is usually only available to users with over 10,000 followers - but businesses with an Instagram Shop can use it too, no matter how many followers they have, to direct users to their Shop.
Tag Products in Posts
To tag products within an Instagram post, start by uploading a photo as you normally would, then follow the below instructions before posting.
1. Tap “Add photo”.
2. Add a caption.
3. Tap on “Tag products”.
4. Tap on your photo.
5. Search for the relevant product.
6. Select the product.
7. Tap “Done” and share your photo.
Shopping Sticker in Stories
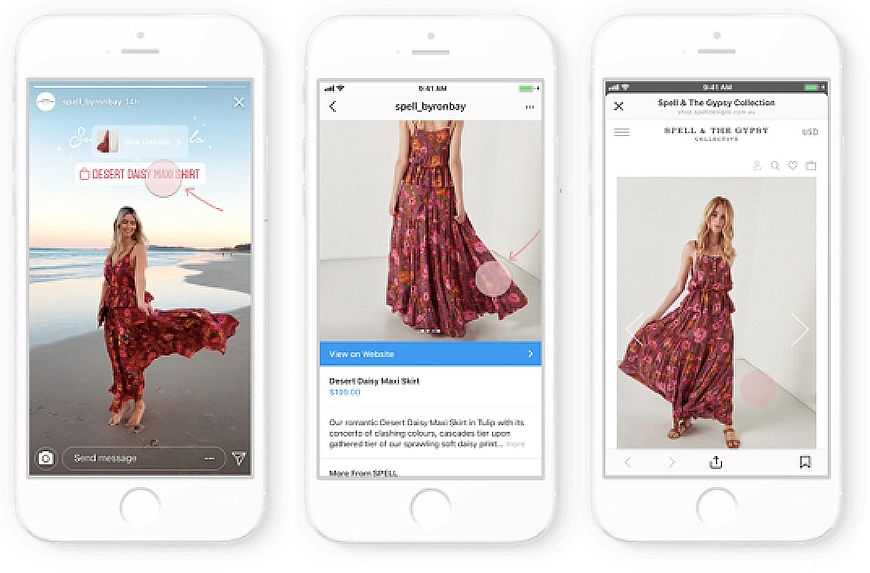
After choosing an image to share on your story, follow the below steps before posting to make it shoppable.
1. Tap the sticker icon in the top right corner.
2. Select the product sticker from the stickers list.
3. Select the product from your catalogue that you want to feature.
4. Move the product sticker to wherever you’d like it to appear on your story.
5. Change the text colour of the product sticker by tapping the sticker.
6. Share your story for your followers to see!
Live Shopping
Did you know you can offer real-time shopping experiences by tagging products when you go live on Instagram too? Before starting a live broadcast you can add up to 30 items to a collection to showcase throughout your video. Then, during your live stream, you can feature one at a time. Not only does this let you demonstrate how to use a product, it also allows you to provide reviews and recommendations and answer questions from your audience. What’s more, you can use live content to keep your viewers up to date about new products and promotions so that they can be the first to know, boosting the sense of proximity between them and your brand and ultimately making them feel like valued customers.
Summary
Setting up an Instagram Shop is a good first step when it comes to making sales for your eCommerce business, especially considering today’s ever-evolving online retail market. Don’t forget to follow @shop to discover emerging brands from all around the world and see how other companies are making the most of the feature.


