

Share
Whether you’ve just set up an Instagram account for your brand and you’re starting from scratch or you want to improve the reach and success of your existing profile, there are plenty of steps you can take to optimise your page and make sure it gets seen by the right people. Follow our guide below to make your profile stand out from the crowd and increase the likelihood of converting your Instagram visitors into customers!
Step 1: @Username and Name
Ideally, your Instagram @username should simply be your brand name. However, if your brand name has already been taken by another user, consider adding a symbol such as a full stop or underscore, or an extra word that relates to your industry (ours is @3sixfivesocialmedia, for example). You’ll also need to add a main name for your page, which can be different from your username - so if you aren’t able to use your brand name as your username, you can at least feature it here.
Step 2: Switch to a Business Account
If your Instagram account is currently a personal one, you’ll need to switch it to a business account to be able to access a few extra features, such as the professional dashboard. To set up a business account, head to your profile and tap the menu icon in the top right-hand corner, then tap ‘Account type and tools’, followed by ‘Switch to professional account’. Then select ‘Business’.

Step 3: Select the Right Business Category
When you switch from a personal account to a professional one, you’ll need to choose which category your business belongs to (such as hair salon, pub, marketing agency or coffee shop). Your chosen category will be displayed below your page name on your profile. This is a way for Instagram to use data to send you relevant information such as ads and accounts that may interest your category, and is also a great way for your audience to quickly see what type of business you are running. This is especially useful if your brand name alone isn’t enough for people to know what you offer.
Here’s an ultimate list of all the business categories available on Instagram.
Step 4: Add a Profile Picture
Use a high quality image for your profile picture, ideally a JPEG that’s at least 400×400 pixels. In most cases, your profile picture should be your company logo, but for businesses with a physical location (such as restaurants and hotels), a nice photo of the building exterior could also work well. Either way, it should be easily recognisable and representative of your business.
Bear in mind that your profile picture will be displayed as a circle and that most people will view your Instagram page on a phone screen instead of a desktop computer, so if your brand’s logo contains any small details or if it won’t fit nicely into a circle, it may be best to create a simplified version to use here.
For example, here’s our main logo and the smaller version we use as our Instagram profile picture:
![]()
Step 5: Write a Compelling Bio
Your bio should clearly explain what your brand or business is all about and should include relevant keywords to aid your searchability. The maximum character limit is 150, so you’ll need to keep it concise and get straight to the point.
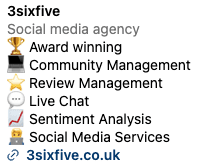
If they suit your brand tone of voice, consider using a few emojis - especially if you’re targeting a younger audience - as they can help to bring your words to life and will add a fun touch to your bio. You could even use emojis as bullet points if you’d prefer to describe your business in a list format rather than writing a single line of text, like in the example below from our Instagram where we’ve listed each of our services with a corresponding emoji beside each one.
If your business has a physical location, it’s also a good idea to include your opening hours in your bio so people can easily see when they can visit you.
Step 7: Add Your Contact Details
Tap on ‘Edit profile’, scroll down to the ‘Public business information’ section and choose ‘Contact options’, where you can fill in your business email, phone number, physical address and WhatsApp business phone number. Within the phone number option, you can choose whether you would prefer to be reached by call or text.
Once you’ve filled all of these sections, when a user visits your profile, they’ll see your address below your bio. Tapping on this will allow them to open it in Google Maps or their phone’s built-in maps app. As for your phone number and email address, these will both pop up when a user taps the ‘Contact’ button on your profile.
Step 7: Add Your Links
You can add up to 5 website links to your Instagram profile. Naturally, the first link should direct people to the main homepage of your website, as this one will be shown in full, while any others you add will be hidden behind a tappable ‘and X others’ button. You don’t have to use them all, but if you do choose to feature more than one link, you could include:
• A specific product or collection on your website
• A current offer on your website
• Your website contact page
• Your other social media profiles
• A downloadable resource
• Your newsletter signup page
You can also add a title for each link to describe what they point to, such as ‘Offers’ or ‘Newsletter’, making it easier for users to see what they’re clicking through to.
Remember - you can’t include clickable links in Instagram post captions, so whenever you want to send users to a website, you’ll need to direct them to the link(s) in your bio. That’s why it’s important to make sure they’re always up to date and that the correct ones are visible.
Step 8 (Optional): Add an Action Button
Action buttons are additional CTA buttons that are available to business accounts on Instagram (this feature is slowly being rolled out and may not be available to you yet). They aren’t applicable to all business types so it’s not mandatory that you add one, but they can act as a handy conversion tool for some brands. The following action buttons are currently available:
• Book now: Allow users to book an appointment
• Reserve: Allow users to make a reservation at your restaurant
• Order food: Allow users to order food delivery or takeaway from your restaurant
• Add lead form: Collect contact information and other details from potential customers
Only one action button can be displayed on your profile at a time.
Step 9: Set Up Story Highlights
Story Highlights enable you to showcase your favourite Stories and keep them on your page forever, rather than having them disappear after the usual 24 hour story period. Highlights appear as tappable circles below your bio.
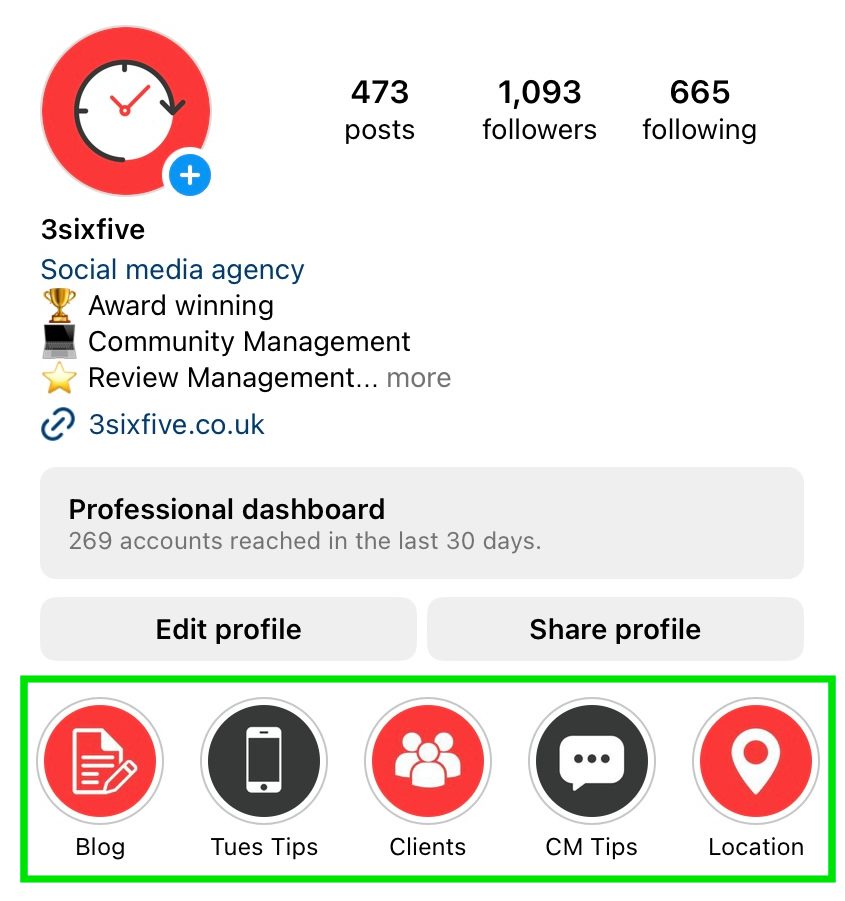
It’s up to you how you choose to categorise your Highlights - they could be sorted into months of each year, or topics such as ‘Blog’, ‘Clients’, ‘Testimonials’ and ‘Events’. Restaurants and pubs may want to use categories such as ‘Food’, ‘Drinks’ and ‘Live music’. Don’t forget to also upload a cover photo for each Highlight that matches your branding style and symbolises what’s inside.
Step 10 (Optional): Set Up an Instagram Shop
If your brand is in the eCommerce space, you may want to consider setting up an Instagram Shop. This allows you to tag products from your store in your posts, stories and ads so people can buy them directly via your content. Plus, if you’re based in the US, you can use the checkout feature to allow customers to complete their purchase without even having to leave Instagram.
To set up your shop, head to this page, then select ‘Get started’ and ‘Create a shop’. If you’re already selling on Shopify or another partner platform, choose this option to create your shop there. Alternatively, you can set up your shop using Meta’s Commerce Manager, a tool where you can manage your inventory, product catalogue and collections.
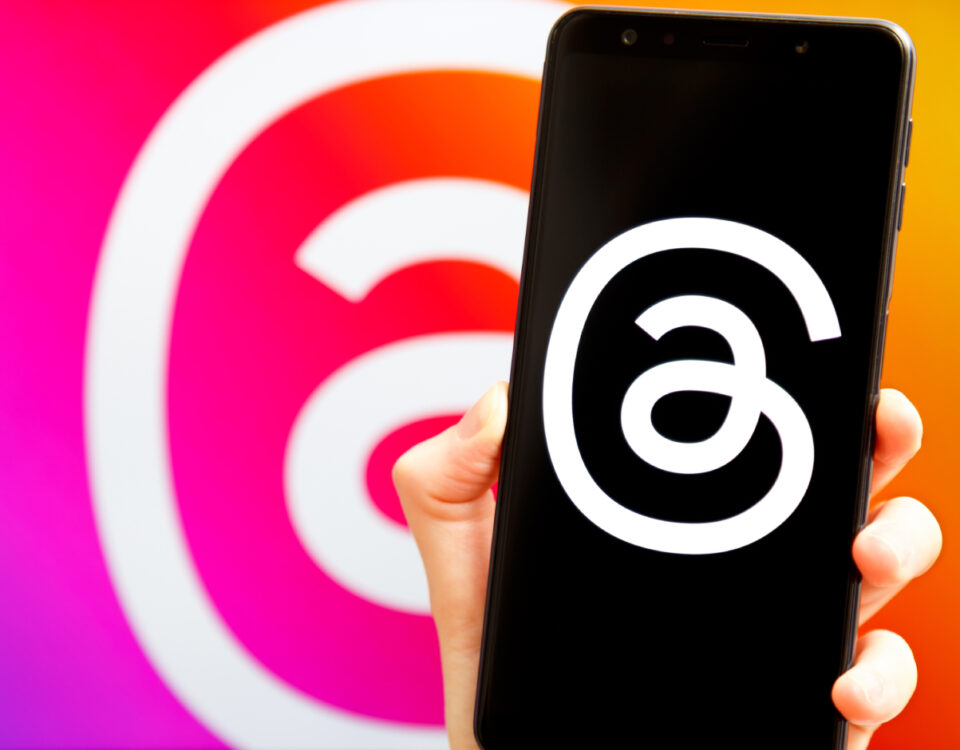
Step 11: Display Your Threads Badge
If your brand is active on Threads, you can display a badge on your Instagram profile so your followers can easily tap through to your Threads page. Simply head to ‘Edit profile’, then tap on the ‘Show Threads badge’ toggle to switch it on. Your Threads username will then appear as a grey button below your Instagram page name.
Summary
Now that you’ve followed all of our profile optimisation steps, you should be ready to start sharing great Instagram content that captivates your audience and achieves your desired goals - whether that’s engagement, web traffic, sales or new followers. Lacking key profile elements, such as a profile picture, bio or links, will make your Instagram presence much less effective, as your page will be hard to find and it may be difficult for users to carry out the actions you want them to take. Make sure you’ve filled out all of the relevant sections and don’t forget to update them whenever something changes within your business, such as your opening hours or contact details.
Got a question regarding Instagram optimisation? Send us a DM @3sixfivesocialmedia and we’ll be happy to help!